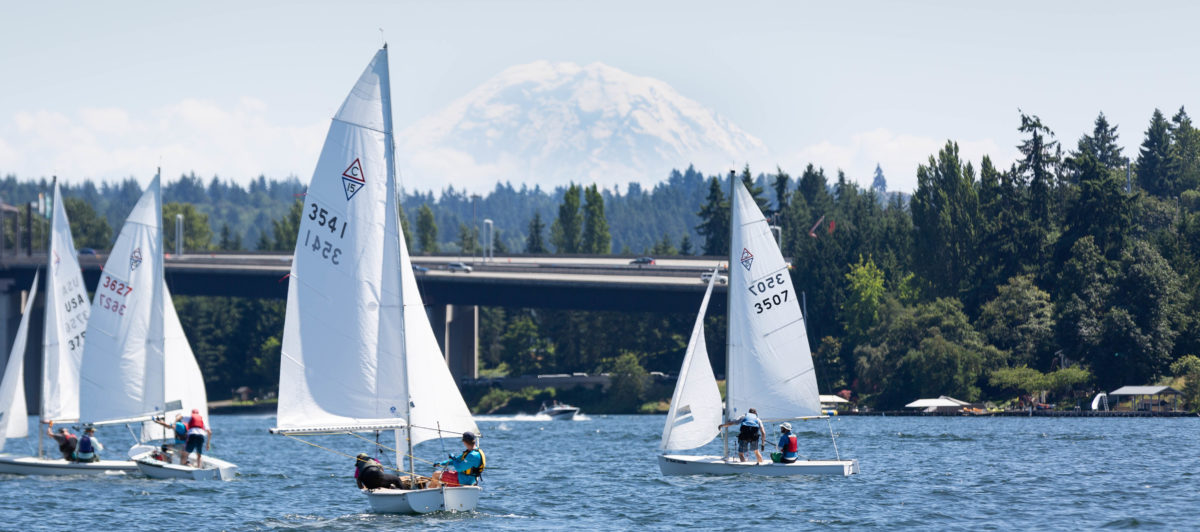
BEFORE WE BEGIN
Assume for the purpose of this tuning guide that you have a copy of the C-15 class rules. This guide is divided into tuning and sailing sections. If you are not interested on working on your boat at all just turn to the sailing section.
Following is a quote by John Kostecki a Silver medalist in the 1980 Olympics and a world champion in the Soling and J/24 classes.
“The most common mistake I see club sailors make when they set up their rigs and sails is that they try to reinvent the wheel. Sail makers invest an incredible amount of effort campaigning In one a design classes trying to find out what the fastest sail and rig combination is. They don’t do it to collect trophies; they do it so they can help their customers go fast. We write tuning guides for the classes that tell EXACTLY how to set the rig up for the sails and how to change gears. If someone follows the tuning guides EXACTLY WITHOUT CHANGING THINGS ACCORDING TO THEIR OWN PERSONAL THEORIES they’re going to be fast. I don’t think enough people understand that. The knowledge is right there for the using.”
WHAT AM I TALKING ABOUT ?
I will make references to “light air” “medium air” and “heavy air.” I am not referring to wind velocity alone. These terms refer to the relationship between crew weight and wind velocity. As conditions change you will need to SHIFT GEARS much as driving a car as you move from one phase to the next.
Light Air – When skipper and crew are both sitting in the boat and there is no possible way for the crew to use the trapeze.
Medium Air – As soon as the crew can use the trapeze until you can no longer keep the boat fiat without changing things.
Heavy Air – As soon as something needs to be done in order to keep the boat flat.
As you can see from here one boat’s “heavy air” can be another boat’s “medium air.” One other important variable is wave height. How this affects the “gear” you want to be in will also be covered in this guide.
WHAT IS GOOD BOAT TUNE ?
Good boat tune comes through balancing the various forces that affect a boat while it is under sail. This manual will only attempt to describe these forces when absolutely necessary.
When working from scratch the tuning process can be long and involved. it is our good luck that in C-15’s as in most one design classes, the factors that affect good boat tune are almost identical from boat to boat within the class. Therefore as stated eloquently by John Kostecki, it is not necessary for you to start the tuning process from scratch. All C-15’s share the same hull shape, sail plan and rigging plan You can and
should take advantage of the experience of others and the 20 years of trial and error that has resulted in the setup described in the following “‘cookbook.” Follow the instructions in the “necessities” section, and your boat will be fast enough to win any regatta… the rest will be up to you
One important force that affects a C-15 is the weight of the crew. Good boat tune must consider the weight of the crew. It Is important to understand that a light team can go JUST AS FAST as a heavy team with the proper setup. Some variation can occur at extreme with velocities but a proper setup will permit you to be very competitive even in the extreme cases will point out differences In setup where crew weight is an issue
The “cookbook” process of tuning your boat is easy. Many sailors work hard on their boats areas that provide marginal improvements. This is fine if you enjoy working on boats. If you don’t, my suggestion is do the things listed here as minimum requirements, and spend the rest of your free time just sailing. I promise that simply sailing more often will result in larger speed improvements than can possibly be achieved by tinkering with your boat.
FULL SAILS OR FLAT SAILS?
This is an important subject to discuss because much of what I describe in this guide affects the sail shape. Generally speaking the obvious is true; you want full sails when you need more power (for example when you are trying to hold your crew out on the trapeze), and flat sails when you need to de-power (while trying to keep the boat flat in high wind).
Light air is very deceptive when it comes to sail shape. Your C-15 sails are cut to work for ideal wind velocity of around 10 knots. In light air the jib luff wire will be too straight because of the lack of wind friction on the jib. This will cause the jib to be too flat. Also in light air the mast will be too straight because of the lack of main sheet tension required to keep the leach open. This will cause the main to be too full!
It is commonly thought that you want your main to be full in light air. This is not true. In light you want the leech to be open and this is usually confused with having full sails because both can be controlled by the tension of the main sheet. In light air the wind flow will detach from surface that is too sharply curved, causing the sail to stall and actually loose power.
In the guide below we strive for a flatter main and a fuller jib in light air. in medium air we try power, full main and jib. In heavy air we depower by flattening the main and the jib.
FOR BEGINNERS
If you are a beginner, people may be telling you that beginners don’t need to set their boats properly, that you should learn to sail first. This is nonsense. Feedback is the PRIMARY source of teaming in sailboat racing Proper decisions NEED to be rewarded in order to aid the learning process and it is also a fact that a poorly set up boat will more difficult to sail. Set your boat up according to this guide and what occurs out on the race course will almost always be an accurate test of your improving skills. I am not telling you to spend hours and hours working on your boat. Do the required things in a minimum of time and then GO SAILING
THE MINIMUM
At the very minimum, you will need to do steps 1,2, and 3, This includes installing a jib halyard lock, setting the rake and installing a mast partner. A new factory main can be acceptable but you will need an UIIman jib. If you don’t want to deal with the rig tension, just get the rake correct and get the rig tight enough so the mast is locked in position. If you don’t want to deal with centerboard gybe at least try to get it vertical and put some tape on the part that sticks out of the well so that the trailing edge doesn’t move side to side.
TUNING OPTIONS LIST
Here is a short list of the tuning options for boat speed. They are in order of importance.
1. JIB HALYARD LOCK – You need a Jib Halyards Lock to control mast rake and sail shape.
2. MAST RAKE – Set mast rake between 23 feet 6 inches and 23 feet 8.
3. MAST PARTNER – Mast Partner – get one from the factory or Jim Holder or make one.
4. SAILS – Get new Sails – Ullmans or a 1 season old set of the same that are in good (!) shape.
5. RIG TENSION – Proper rig tension means that 2 people will be required to put the jib halyard in the lock.
6. CENTERBOARD GYBE- Centerboard rake and gybe – board vertical, 1/4 inch gybe in front, fixed in back.
7. BLADES – Use the white molded factory blades or custom blades. The old wooden factory blades will hurt. If you use the white factory blades be sure to shape them. The Custom blades by Waterat are great but they cost about as much as a set of sails. The advantages are that they are light and the shape is perfect.
8. STERN SHEETING – Stern sheeting with 5 to 1 Mainsheet purchase, a ratchet block and a mainsheet that is difficult to cleat.
9. VANG – Rig 16 to 1 Vang purchase that the skipper can adjust while sailing. This is critical for light teams.
10. MAST BLOCK – Make a proper size mast block and use it in all conditions but light air.
11. CENTERBOARD GASKET – Install a mylar and Sailcloth centerboard Gasket.
12. TRAP HANDLES – Set the trapeze handles 26 inches above the tank.
13. SPREADERS – Install short spreaders (14 inch) or fix your long spreader rake between 8 and 9 inches, 8 inches for the heaviest of crews. 9 for the lightest.
14. MAIN CUNNINGHAM – see diagram
15. JIB CUNNINGHAM – see diagram
16. MAIN OUTHAUL – see diagram
17. WHISKER POLE TROLLEY – see diagram
18. BULKHEADS – These are great for increasing your C-15’s life span. In addition they make the boat easier to tune because it won t flex under load and the deck won’t crack and deform over time. If you want them pay someone who can work well with fiberglass to do the work. Only a very sick person would install bulkheads for fun. (for more info see the section on Bulkhead Installation)
TUNING THE MAST
The Mast Step
Make sure that the mast step is at the standard factory position. If it is not there, move it there. It is NOT necessary to push the step any further forward than the standard position. Your mast step plate should have 2 bolts, one for the lifting hook on the base of the mast and one for the mast to sit on. The bolt for the mast to rest on should be in the most forward hole.
Jib Halyard Lock and Mast Rake
These are items 1 and 2 on the list, but because they are directly related I will cover them in the same section. If your boat does not have a jib halyard lock you will need to put one on. Buy a jib halyard, a halyard lock and a shroud adjuster. The jib halyard should be 3/32 inch (or 1/8 inch. but be sure you have the right size lock) stainless wire with a swag Ed loop and thimble at one end, a lock ball 36 inches from the loop and another staged loop with NO thimble at the other end. The total length of the halyard should be 226 inches.
With the mast up lay the boat on its side. Attach a tape measure to the main halyard and pull the tape to the top of the mast, putting the main halyard ball in the lock. Space the jib halyard sheave box away from the mast with washers, otherwise the lock ball on the jib halyard won’t be able to pass between the mast and the sheave. You can replace the standard jib halyard sheave box with a bale, twist shackle and wire Harken block. (See the Jib Halyard Lock diagram) This will make it much easier to raise and lower your jib but, of course, it is not a factor in boat speed.
To start, pin the shrouds so that there are 2 open holes between the shroud pin and the chain plate. Attach the jib luff wire to one end of the new shroud adjuster. Use clevis pins and ring-a-dings. Attach the jib halyard to the center of the new shroud adjuster. Stuff the halyard through the jib sheave box and run it to the base of the mast. Pull the halyard tight enough so that the shrouds are snug and tie it off at the base of the mast. Make sure that the forestay is hanging loosely and not carrying ANY load.
To measure the mast rake, use the measuring tape attached to the main halyard and determine the distance from the top of the mast to the top of the transom. Fiddle with the shroud adjusters for both the jib halyard and the shrouds until you get 23 feet 8 inches. At this point the shrouds should be just snug enough so that the mast does not move. Mark the position of the jib halyard lock ball on the mast. Install the jib halyard lock there.
Put the boat upright, Move the shrouds down so that you ABSOLUTELY CAN’T put the jib halyard in the lock by yourself. Have an assistant pull hard on the forestay and you should be able to drop the halyard ball in the lock. If you have a rig tension gauge you should get 300-350 Ibs on the shroud. Measure the rake, same as before, with the tape attached to the main halyard and the main halyard in the lock. The distance to the transom should be 23 feet 6-7 inches. You can fiddle with the shrouds and the adjuster on the jib halyard to get it right.
If you have LONG spreaders, site up the mast track with your eye. mast should have about 1 to 2 inches of bend AFT If not, you need to angle your spreaders further back, this will force your mast to bend more. Once everything is perfect mark the shroud positions on the shroud adjusters with a permanent marker.
THE MAST BLOCK
With your rake now perfect, cut an L shaped piece of wood. A 2×4 works fine or you can use nicer hard wood if you want. One end of the L should drop between the mast and the mast partner without falling through, There should be a close fit but NO force should be required to put the block in position. Reverse the block and drop the other end between the mast and the mast partner. There should be about 1/4 inch of space remaining. Don t use the block in light air. Use the thicker end as soon as the crew is on the trapeze. the wind gets heavy, reverse the block if you have a good opportunity. This allows more mast bend and flattens the main. Remember, the only time the block should be removed is in light air.
THE SPREADERS
You have two choices, short factory or long Vanguard, the old long factory ones are a poor third choice.
Short Spreaders
Easiest is using the short (14 inch) factory spreaders that have been available for the last 4 years. If you are going to switch from long to short spreaders, remember that your shrouds must also be shortened. With short spreaders you can use the standard factory bracket and not bother trying to position them.
Short spreaders prevent you from bending your mast with rig tension. The “pre-bend” possible by long, raked spreaders is only useful in very light air.
Long Spreaders
You are entering the diminishing returns zone. If you want long spreaders, you need to buy a Vanguard Spreader bracket and spreaders so that the rake can be properly set. Your long spreaders should be FIXED in position at an angle of between 8 and 9 inches. Install your spreaders with only one bolt (make it tight) so they can be adjusted by taping them into position. To obtain the measurement, place a long batten from spreader tip to spreader tip so that it rests against the shrouds. the distance from the center of the batten (midway between the shrouds) to the sail track. Once your spreader angle is set, drill a second hole through the bracket and spreader on both sides and add a second bolt.
The spreader angle forces your mast to bend under rig tension. Standard length spreaders (17 inch) will accomplish this. Longer spreaders or spreaders with too little rake will hurt your performance by pushing the mast sideways into the slot. If you don t believe me look up your mast some time while going upwind. go further forward than 8 inches. Under rig tension, less spreader angle could cause your mast to invert.
THE MAIN SHEET SYSTEM
The old factory traveler bar and car requires you to pull the traveler car up to the weather tank in almost all conditions. I believe this is unacceptable because it makes proper tacking impossible and is slow in light air. If you insist on keeping this traveler I would suggest putting it in the center and never adjusting it. If your are truly attached to the bar, buy a hoop traveler from Ray Gonzales. The result is the same. Put it in the center and adjust it only in very light air.
Of course, the ideal mainsheet setup is stern sheeting. You can center the boom in light air without fooling with a traveler, Some people with stern sheeting have a Snipe type adjust on their traveler. This falls into the diminishing returns zone. A mainsheet and a vang will work perfectly on a C-15 in 99% of the conditions you will sail in.
Rigging Stern Sheeting
If you have an old traveler bar system you will need to attach an additional mainsheet to the end of your boom. If you have a new boom you will need to add an additional block middle of the boom about 4 inches in front of the existing one. Replace the ratchet attached to the barney post with a BIG harken hexerachet block that has a becket. Attach another another mainsheet block (using a piece of wire or line) to the becket of the new ratchet mounted on your barney post. This block is called the mainsheet floater. It is critical that two blocks be able to swivel independently. Do not use a double block. Mount a eye strap on each rail about 6 inches from the transom of the boat (or drill a hole in each spot). Buy or make a 35 foot mainsheet with two smaller diameter lines (5 feet in length) tapered to one end of the mainsheet. Tie the smaller pieces of the mainsheet to the eye straps (or holes) on the rails of the boat. Thread the mainsheet through the block on the end of the boom through the middle block on the boom, down through the mainsheet floater block, back the forward mainsheet block on the boom, and finally back down through the ratchet block the barney post and through the cleat. Raise the ratchet block on the barney post so it is difficult to cleat the main while sitting on the tank. You can do this by adding shackles between the ratchet and the barney post and then adding tape or a spring to stand the block up. This system gives you 5 to 1 purchase. (It really does, just remember that the purchase is doubled because of the additional leverage). with a ratchet you should be able to sail in most conditions with the mainsheet uncleated and in your hand.
THE BOOM VANG
Other than the mainsheet, the vang is the most important control for depowering a C-15 vang should be 16 to 1 and lead to the side tanks so that the skipper can adjust it El while sailing. A very simple system using 9 Harken bullet blocks, one double harken bloc 2 cleats can be rigged in about an hour. If your vang is attached to a pad eye on the under of the boom it is critical to replace that pad eye with a boom bale. See the attached diagram
THE BLADES
The current factory centerboards and rudders are heavy but their shape is good. They are molded copy of Sid Corp’s classic blades of the 1970s. The old factory wood blades are work benches, don’t expect much if you sail with them.
Custom Blades
A custom set of blades will cost you between $700 and $800. This may seem expensive except when you consider the fact that they are about the same price as a set of sails and you will only need to buy them once. One excellent source exists at the time this revision of the tuning guide was printed. Larry Tuttle of Waterat in Santa Cruz CA has been producing C15 blades since 1986, they are excellent. As I have said, new blades are optional. A properly setup C-15 will lose very little by using standard blades.
Shaping the factory blades
The white molded factory blades can be modified to provide good performance. Sand off the ridges left during the molding process. Try to make the trailing edge be as sharp as possible. The standard leading edge is too blunt. Shape the leading edge (the front 1 inch) so that it has about the same shape as a bullet (parabolic).
INSTALLING THE CENTERBOARD
Buy a Mylar Gasket
Order a C-15 gasket from Ullman sails. It should be sailcloth with Mylar stitched inside. Make sure that you ask for BOTH sides of each piece of gasket material to be stitched. Buy some aluminum or copper tube the same diameter as the female end of the centerboard hanger pin. Buy a strip of Delrin (or Teflon) approx 3 feet long, 1/8 inch thick and 1 inch wide. Buy a roll of cheap duct tape.
Getting the Centerboard to Gvbe
Flip the boat on its side with the mast up. Put the centerboard down and draw a pencil line across the top exposed part at deck level.
Remove the centerboard and hangers from the well. You can t get proper size gybing strips that will fit past the centerboard well lip so jig saw off the lip of the centerboard well from the barney post forward. (If you are going to replace your gasket this is a good time to remove the plastic gasket strips and old rubber gasket. Optionally you can make 2 aluminum gasket strips to replace the plastic ones. Copy the plastic ones exactly and be sure to predrill and counter sink the screw holes.)
Cut a spacer from the aluminum tube and put it on the male end of the centerboard hanger pin. It should be difficult to jam the hangers down in the well with the spacer added. Use some silicone lubricant to help. Find the right spacer size before proceeding.
Build up vertical gybing strips using 1/2 inch strips of duct tape on the head of the centerboard. This will probably use a lot of tape. Put the gybing strips FORWARD from the trailing edge of the board. Use the pencil line you drew as a guide. Get the strips as far forward while still maintaining contact with the top of the well (the pencil line). You can put your gybing strips along the aft edge of the board. This is MUCH better than no strips at all and it is easier to do. Remember, the gybing strips must make contact with the top and bottom edges of the well. Strips will crack your well if they don t contact the top and the bottom edges. Keep testing the fit of the board in the well and add tape until you get a good fit. You may have to add additional pieces at the top of the strip because C-15 wells tend to be wider at the top.
Once a nice fit is achieved, peel the duct tape strips off and grind your Delrin strip down to match the duct tape strips in thickness. Grind a single piece of Delrin and then cut it in half lengthwise to get 2 equal sized strips. Screw the Delrin gybing strips to the centerboard, in the same location as the duct tape strips. Be sure to COUNTERSINK the screws so they don t scrape the sides of the well. Fine tune the tit of the board in the well by using a disk grinder on the strips.
Installing the Centerboard Gasket
Trim the gasket pieces so that they will fit flush to each other when installed. There should be NO OVERLAP when the strips are installed. Screw the forward edges of the gasket and the top strip down. Gasket pieces are usually extra long so poke a hole in the excess at the aft end of the well and STRETCH the gasket by tying a piece of line from the gasket to the bottom gudgeon. Drill and screw the remaining holes and duplicate the procedure on the second gasket piece.
Setting the Centerboard Stop
Using a square make sure that the centerboard is slightly less than vertical. measure board squareness against the bottom of the boat next to the centerboard. C-15 s go very slow with centerboard past vertical (in addition to being illegal) so play it safe with a setting slightly LESS than vertical. This won t affect your boat speed at all. Install a positive stop on the board. If you have accidentally installed your stop so that the board drops past vertical you can always shim it with some battens and duct tape under the stop,
Test your centerboard gybe. You should get slightly less than 3/8 inch in front and 1/8 inch in back or 1/4 inch in front and none in back (if your blocks are on the aft edge). The rules require no more than a 1/4 inch difference between the front and the back. With this kind of system it is hard to get more than that difference.
TRAPEZE HANDLE HEIGHT
The C-15 comes standard from the factory with handles that are too low. Low handles make sailing a C-15 more difficult than it needs to be. With a high handle the crew can grip the handle and go out with a straight arm while still clearing the side of the boat. If you plan to go out on the handles with low handles bring aspirin, your elbows will need it. Even if you are not going to go out on the handle, a high handle makes it possible for the crew to raise up in light air or raise up to clear waves in a breeze. These things are important because the sooner the crew can get out on the trapeze wire the faster the boat will go and the boat will most certainly go faster if the crew isn’t dragging through the waves.
Measure the distance from the handle to the base of the shroud, This distance should be no less than 26 inches. If it less cut and reswage the wire. Be sure to account for the amount of wire used by swaging
INSTALLING BULKHEAD
What is a Bulkhead ?
Good question. A bulkhead is a piece of material (usually plywood) that is glassed into position. to connect the hull and the deck. Have you ever looked at an I beam? Take three flimsy strips of material (try this with paper and tape), attach then together in an I shape, and suddenly you have a rigid object. As soon as you prevent the top and bottom surfaces from moving relative to each other (the top and bottom of the I) the object becomes rigid. Bulkheads will increase the life span of your boat by tying the hull and deck together somewhere other that at the rails and the centerboard trunk. Older boats will flex 1 to 2 inches under the load from the shrouds which does nasty things to your deck gel coat. This is not a tight rig, loose rig issue either. The shroud loading that occurs when you have a good breeze greatly exceeds that produced by tight shrouds.
New boats — old boats
There is a big difference between the new design boats and old boats when it comes to bulkheads. C-15’s (with the modernized deck layout) have bulkheads already instated by the factory. These bulkheads are attached to the deck but not the hull. They do a reasonable job of keeping the deck from flexing but do little to relieve the torsional flexing that can occur. The older design boats have a flimsy bulkhead right under the hatch opening, which is too far forward to do any good and is actually a barrier that must be removed.
Do I want to do this?
No. Installing bulkheads is a very special C-15 sailing activity that only true garage sailing animals should attempt. I would include this activity in a shod list that includes cutting your own sails or building your own blades and suggest that it is more fun to pay someone to do it Typically a bulkhead installation will cost about $300 which is a good deal when you consider what you are getting.
What do I need?
You need 1 ) a roll of heavy, 4 inch wide glass tape, 2) fresh polyester marine resin and catalyst 3) a plastic syringe, 4) a box of surgical gloves, 5) 8 surgical mask, 6) plastic Dixie cups, 7 wooden stir sticks, and 8) cardboard box cut into 2~ by 2ft pieces, 9) someone to hand you stuff while you are inside the bow.
Working with polyester Resin
The correct ratio of catalyst to resin is 4%. Don t screw this up or you will hate life. Get a cup of water. The syringe up half way (make sure it is well marked) and squid it into an empty cup Fill and squid 24 more times and then mark the water level in the cup. Mark all the rest of your cups. Whenever you need to mix a batch of resin, fill the cup to the mark with resin, fill the{ syringe to the 1/2 mark with catalyst and then squirt it in. Duck soup right? Stir with a wooden stir stick for about 30 seconds and it is ready to go.
Work with small pieces of glass tape by cutting off a stack of 6 inch sections. Do this before you start mixing resins Fold about 1 inch of the edges of your piece of cardboard up and tape them into position to make a large, shallow, fiat dish, Arrange your glass tape in the dish with no overlap. Mix your batch of resin and pour it onto the pieces of glass tape. Use your stir stick to spread the resin on the pieces, making sure that they get completely wet. someone else to do this for you. They can then hand you the cardboard dish while you relax comfortably in the bow of your boat, wearing your very stylish surgical mask, surgical gloves and clothes you never plan to wear again.
Keep the box of gloves with you in the bow. Each time you finish laying the box of glass tape, pull the gloves off and hand them out with the empty box. Then leisurely put on a new pair while a new batch of wet tape is being brewed.
I have a new Boat
“All” you need to do is glass the factory bulkhead down. This would be easy except that the new boats have an insert in the hatch to keep your stuff from getting wet and covered with fiberglass dust. You need to remove the insert (affectionately referred to as the “garbage can”) to get to the bulkheads. Lay the 6″ by 4″ pieces of wet (with resin!) glass tape so that the gap between the hull and the bulkhead is filled. Overlap the pieces.
I have an Old Boat
Poor you! First, you will need some additional things. Call me and I will send you a cutout of the correct bulkhead shape. (310-420-2588) You will also need some cavosel (very fine milled glass), several plastic paint dishes (about the size of one of those large margarine tubs) and a 4 ft by 4 ft sheet of 1/4 inch mahogany plywood. Now get into the bow of your boat and hack the old bulkhead out (this is really nasty).
Cut two pieces of stiff cardboard using the cutout shape I sent you. Make them about 1/2 inch too big all the way around. Mark them “left” and “right” or If you prefer a nautical theme “starboard” and “port”. Take the cardboard, a pair of scissors, and a pencil into the bow with you. Hack on the cardboard until you get a decent fit on each side. This does not have to be perfect! Where do they go? In the side tank right at the chain plate. Now, use these cardboard pieces to cut your pieces of plywood and then test the plywood for fit. Cut the indicated holes into your plywood bulkhead. You will need these to position them. Get back into the bow and tape the bulkheads into position. Tape them from the BACK SIDE by reaching through the holes in the bulkhead.
You now need to prepare a batch of fiberglass goop. Make up enough cups of resin so that you fill the plastic paint dish about 1/2 way up. Fill the rest of the dish with cavocel and stir. You will need to add cavocel several times until the goop is stiff enough. The stir stick should stand upright unassisted and the goop should stick to the stick without falling off when you pull it out. Get into the bow of the boat and have the goop handed in to you. You better be wearing surgical gloves! Grab a handful of the goop and smear it around the edges of the bulkhead, filling in any gaps and making a nice 45 degree slope from the hull to the bulkhead. Use the entire batch of goop, then pass out the gloves and the dish. Put on new gloves and have the cardboard dish with wet(resin) tape passed into you. Lay the tape all the way around the bulkhead, right on top of the wet goop. Overlap the tape and smooth out the air bubbles. Now do again on the other side. Lots of fun right? This Is what sailing IS all about.
Give your bulkheads a couple of days to cure before you go sailing.
THE SAILS
New sails produced by a custom sail loft are much faster than anything else available now. At the time this guide was written, only Ullman and North Sails have been actively pursuing sail development in the C-15 Class, Sobstad has been active in the past. A main will generally last 2 years, a jib should last 1. Someone’s old sails are fine to practice with or to race with in very light or very windy conditions. Sadly there is a significant difference in performance between new sails and old sails. When I was sailing C-15s exclusively I bought a new set every year around a month prior to the Nationals. I rationalized that the $400 I was spending per year was just part of a sailboat s upkeep. For me the additional money was worth the additional fun I received by being fast (this is still not a substitute for being smart.)
If the money bothers you (and we’re talking $700 per set now) there are some things you can do. Keep two sets of sails, a new set that you use only for major regattas (3 or 4 times per year) and a used set for everything else. Store the sails INDOORS. Heat and sun will age a set of sails rapidly. Drop your sails while at the dock rinse them with fresh water after racing and ROLL them for storage. Treated properly a new set of sails can last several years. Jibs wear out twice as fast as mains so you can buy a jib every 1 to 2 seasons and a main every 3 to 4 seasons.
If you are going to participate in a North Americans use that as an excuse to buy a new set. A North American regatta will be a memorable experience and your chances of enjoying it improve with your ability to go fast and be competitive.
SETTING THE JIB LEADS
Most jibs come with a trim line drawn in pencil on the clew of the sail. Position the jib lead so that the pencil line and the jib sheet line up. if you don t have a trim line, put the jib car at the back of the track and pull the jib in as hard as you can. This should be done with the mast rake and rig tension set. There should be a HARD crease from the jib tack to the jib clew. Ease the jib are move the lead forward ONE INCH. Repeat the test until you have a SOFT crease when the jib is strapped in. For most sails the lead will end up in the center of the track. Mark the lead positions with permanent marker or tape on the deck.
MAIN SAIL TELLTALE
You will need a telltale attached to the main. This telltale will prove just as important as your jib telltales. Use a four inch strip of cassette tape. Attach it to the leach of the main just below the top batten with duct tape or white sticky back (you can get this from any sail maker).
SAILING THE BOAT
Many C-15 sailors put too much emphasis on pulling strings and not enough on sailing. The most important controls on your C-15 are the main sheet, the tiller, the jib sheet and your bodies. It is important for both the skipper and crew to keep their heads up and their attention on what’s going on around the boat and on the course. Adjustments to other secondary controls only when absolutely necessary — be sure to continue concentrating on sailing at same time.
Turn the boat with your weight and the sails. The large C-15 rudder acts as a brake as it turns the boat. Great boatspeed gains can be made by using as little rudder as possible. Heeling the boat to leeward causes the boat to turn into the wind. Sheeting the main in and easing the jib out will also cause the boat to turn into the wind. Heeling the boat to weather causes boat to bear off. Easing the main out and sheeting the jib in will also cause the boat to bear off. Practice AGGRESSIVELY using your weight and sails instead of the rudder to steer the boat. This is especially important for the crew, whose movements are not restricted by having to the tiller.
SHIFTING GEARS
As conditions change there are things you can do to keep your boat moving at optimums. The following section explains this “gear shifting” process. REMEMBER! t If conditions change rapidly don’t go crazy trying to change settings. Keep sailing and take your time. Nothing; slower than going the wrong way while you are fiddling with a control that will make a two length difference over the course of an entire leg. Critical adjustments will be indicated
following pages with a (*).
LIGHT AIR – All points of sail
Main:* Aft portion of top batten parallel to boom. Make sure main sail leech
telltale is flowing about 75% of the time. Try to center the boom
WITHOUT stalling the leech tale.
Jib* (upwind): Ease out 1 to 2 inches from normal position. Trim in for puffs, then ease out again.
(reach): Crew supports clew by hand.
(pole): Don t set it unless you are POSITIVE the wind won’t shift and that you can carry it.
Boat Balance:* Heel the boat to leeward so that you retain proper sail shape and have some feel on the helm. Flatten the boat in puffs but heel IMMEDIATELY release completely when the wind shuts off.
Vang: * Release completely
Mast Block: Remove
Outhaul: Ease out until only a hint of a crease remains running along the foot of the main sail.
Main Cunningham: Release completely
Jib Cunningham: release completely
Centerboard:
Upwind down
Close reach 3/’4 down
broad reach 1/2 down
Downwind 1/4 down
MEDIUM AIR – All points of sail
Main:* Aft portion of top batten parallel to boom, Leech tail should flow most of the time with occasional stalling (25% of the time). Trim out / in for waves or puffs, YOU NEED TO WATCH THE TAIL CAREFULLY YOU WILL NOT BE ABLE TO POINT IF THE TAIL IS ALWAYS FLOWING AND YOU WILL BE SLOW IF THE TALE IS ALWAYS STALLED, Other than not keeping the boat fiat this is the next most common error made by C-15 skippers. It is as important to watch the main tail as it is to watch the jib tail!
Jib* (upwind): Trim hard. Trim out / in for waves or puffs.
(reach): Crew should support clew by hand until skipper needs help keeping the
boat flat.
(pole): Many crews don t pull the pole far enough back going dead downwind. On a reach don t set the pole until the boat right behind you does. Pay attention to the masthead fly or shroud telltales and adjust the pole accordingly.
Boat Balance:* DEAD FLAT UPWIND !!! Heel boat to weather down. If marginal trapeze
conditions skipper should sit inboard to get crew out.
Vang:* Take the slack out of the vang so that when you ease the main out, the boom height remains somewhat constant.. As the wind increases pull more and more vang. Don t wimp out when using this control! It is much better to have a FLAT main than to let it luff. CAUTION!!! RELEASE the rang at the weather mark. The vang works opposite on a reach than upwind. Additional vang ADDS power when on a reach.
Mast Block: Thick side in, This will power the boat up keep the jib luff straight and give you good leech control on the main. You can switch to the thin side if the wind kicks up, DON’T stop in the middle of the race to do this. Offwind on a reach or run is a good time, If you are really desperate do it during a tack. REMEMBER Nothing is slower than fooling with equipment instead of sailing hard so have a GOOD reason to change this if you do it while going to weather.
Outhaul: Pull it to the band or until you have a hard crease along the foot which ever is first. Forget about it. You can ease the crease out on the reach if its convenient but be sure that putting it back will also be convenient!
Main Cunningham: Pull it in until the wrinkles are gone then ease it they start to come back,
Don t touch it again. Too tight is much worse than too loose
Jib Cunningham: Same as the main but a tad fewer wrinkles, Too tight is MUCH worse
than too loose,
Centerboard: Same as light air.
HEAVY AIR – All points of sail
Main:* Keep telltale flowing, Trim main to keep boat flat. Think trim out and
accelerate, trim in and point. Try to keep boat flat while luffing the main as little as possible.
Jib* (upwind): Try to adjust jib in phase with main. If this is too hard just do it in big puffs.
Adjustments should always be out / in. Think – trim out and accelerate,
trim in and point.
(reach): Concentrate! Keep BOTH tales flowing. Many crews have a problem
with this,
(downwind): This doesn’t change with more wind. Don t shy away from setting the pole in a lot of wind! The boat will balance better and be EASIER to control with the pole up downwind.
Boat Balance:* This doesn’t change with more wind, Upwind the boat should be FLAT! FLAT! Flat This is the single biggest mistake C-15 sailors make in heavy air. Don t hike so hard that you exhaust yourself. Be selective. Hike hard during puffs and combine this with an aggressive out / In trim to flatten the boat, accelerate and then point. On a planing reach move your weight back and let the boat heel (this is the only time that heeling is good except in light air). Downwind, heel the boat slightly to weather and keep your weight back, especially in chop. BEAR OFF and HIKE OUT in big puffs, forget about where the mark is, Use lulls to get back up. If you feel a death roll coming trim the main hard and head up slightly.
Vang:* Vang until you get over bend wrinkles, An over bend wrinkle starts in the center of the luff and heads diagonally to the center of the boom. Get the vang OFF (!) BEFORE going down wind. You will turn over or break your boom if you bear off with the rang cranked on. On reaches vang enough to keep the crew on the trapeze and the boat planing. Remember that the vang ADDS power on a reach.
Mast Block: Thin side in. The block out will allow too much power mast bend and your
jib tuff will sag, making the jib, adding power and killing your pointing.
Outhaul: To the line and forget it.
Main Cunningham: Pull the wrinkles out.
Jib Cunningham: Pull the wrinkles out.
Centerboard: Upwind – 1 inch up, same as light air on other points of sail. NEVER pull
board up more than 1 inch to depower while going upwind.
Between Races – If you have to heave-to between races it is a good idea to pull the
board up halfway. This is a good way to avoid a surprise knock down.
SAIL TRIM IN PUFFY CONDITIONS OR WAVES
One of the most interesting jobs a C-15 team can perform is to properly handle the sails upwind in puffy conditions. As the puff hits your apparent wind (true wind combined with the wind created by your boat moving through the water) will shift abeam because the true component gets stronger. This apparent wind shift combined with the increased velocity will cause the boat to heel to leeward, The most common technique mistake made here is that the skipper will not get the boat fiat and round up out of control with the tiller pulled to weather acting as a brake.
It is critical to get the boat to accelerate during a puff. This will reduce the load on the rig and move the apparent wind back forward where it belongs. When the puff hits ease the main and the jib out together and hike as hard as you can. Working both sails together like this makes flattening the boat easier. If you sheet out just on the main the slot between the main and the jib closes reducing air flow and causing the boat to heel down and then round up uncontrollably. As the boat accelerates start trimming both sails back in while bringing the boat back up onto the wind. You may have to trim out and back in several times as the boat accelerates. Once the boat is up to full speed you will discover that even with the increased wind velocity it will be possible to keep the boat flat.
Another interesting advanced technique can be used while sailing down wind in chop or waves. As the wave lifts the transom heel the boat sharply to weather and BEAR OFF. Add the legal number of main sheet pumps at this time and you will jet down the back side of the wave. As the ride dies off heel the boat sharply to leeward and head back up to gain speed while looking for the next ride. This is a great way to work your way down to the leeward mark and feels great when you hit it right
THE END